Artisanal operator workflow
This guide is for operators whose Planboo menu contains Biomass, Production, Mixture, and Application. It takes one activity from its biomass source through biochar production, mixing, and field application.
Use this guide only for projects configured for the Artisanal workflow. Rainbow distributed projects have different fields and evidence requirements; use the kiln operator workflow for those projects.
Before you begin
Complete Install, sign in, and prepare. Confirm that the correct project, kiln, operators, vehicles, crops, and other selection lists are available before leaving connectivity.
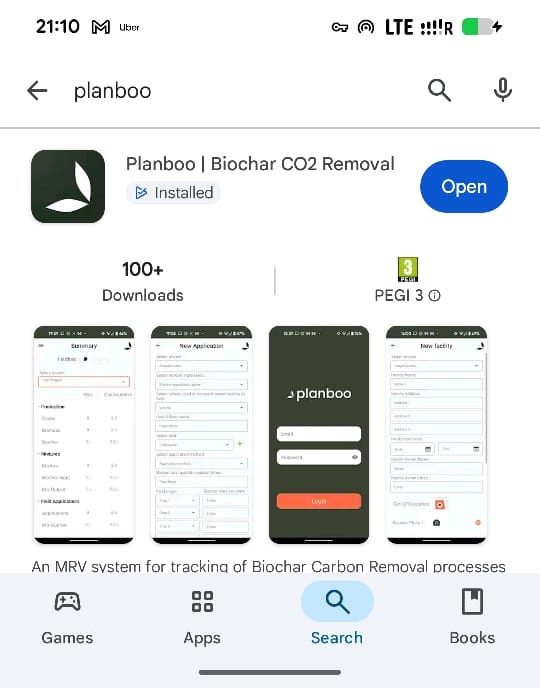
The Android application is also available through the approved Google Play listing shown in the source training manual.
1. Record the biomass source
Open ≡ → Biomass. The screen lists existing fields and facilities.
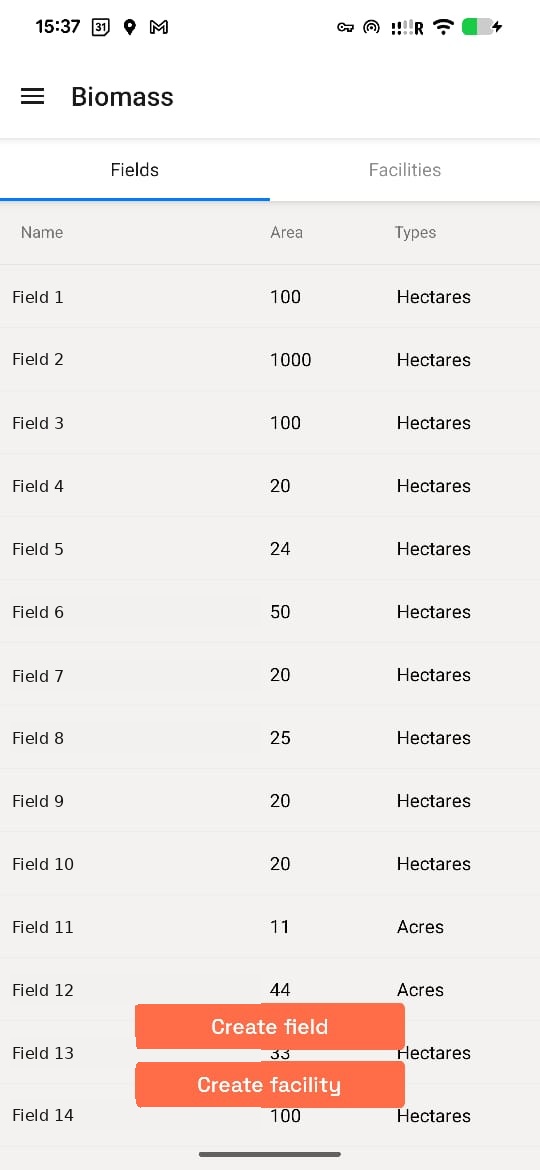
Create a field
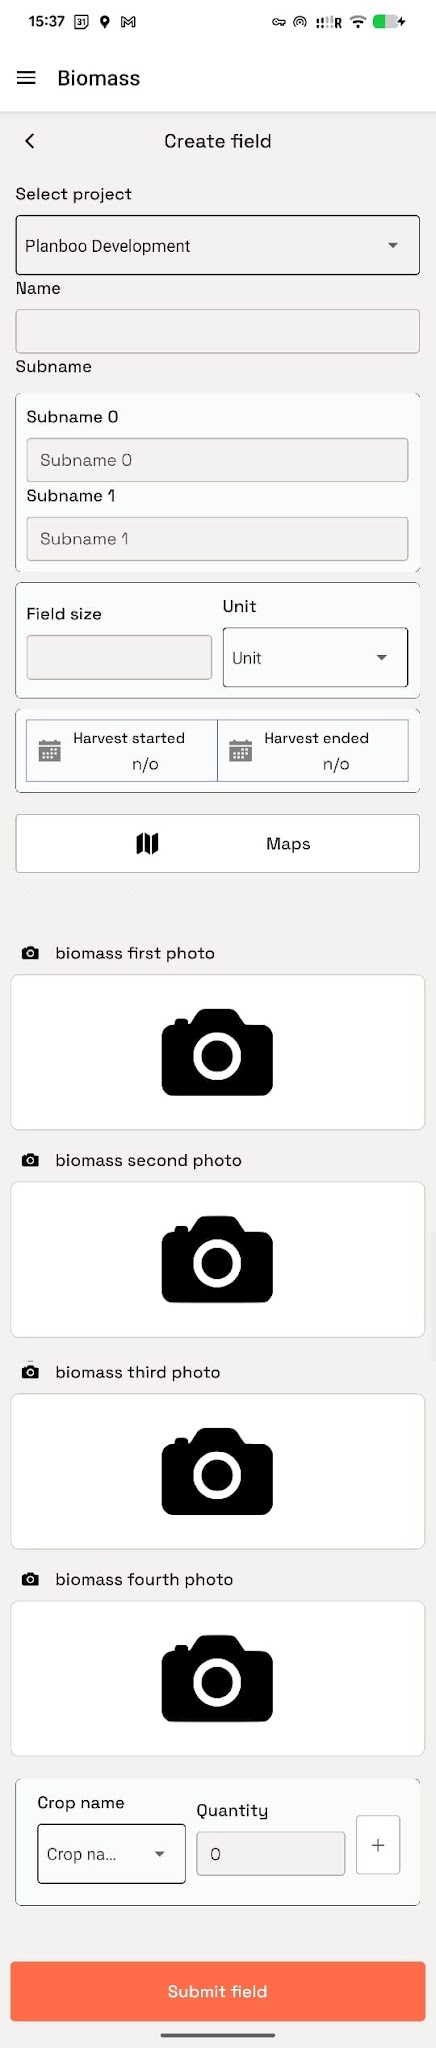
Select Create field, then provide:
- Project: the project receiving the biomass record.
- Field name and any useful sub-names.
- Field size and unit.
- Harvest cycle start and end dates.
- Crop name and expected biomass quantity for biochar production.
- Photos from different parts of the field that clearly show the biomass.
Map the field
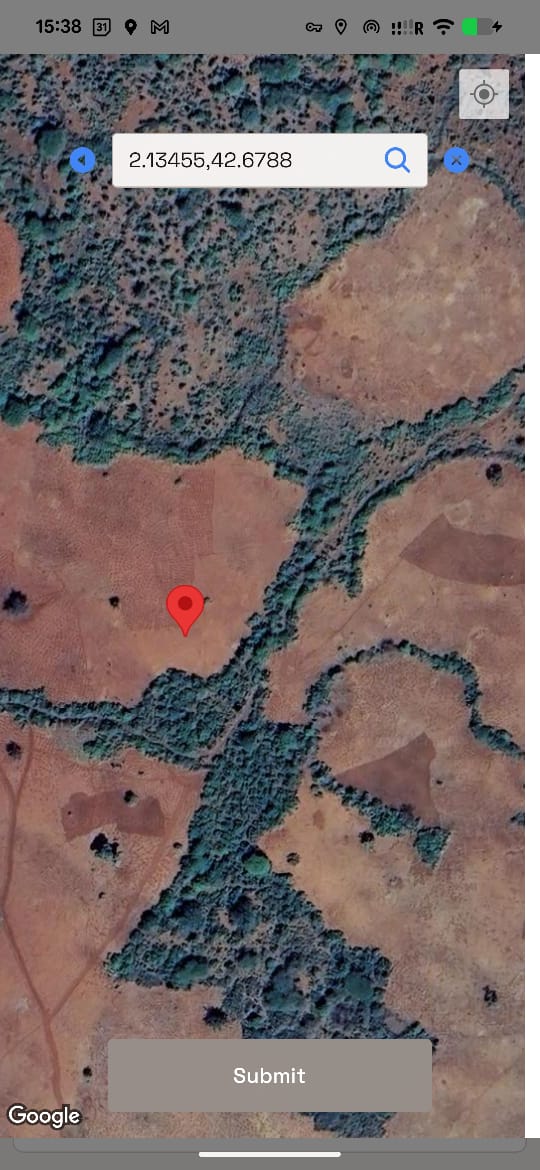
- Open the map control.
- Either select the location button to use the phone's current position or
search for decimal-degree coordinates in
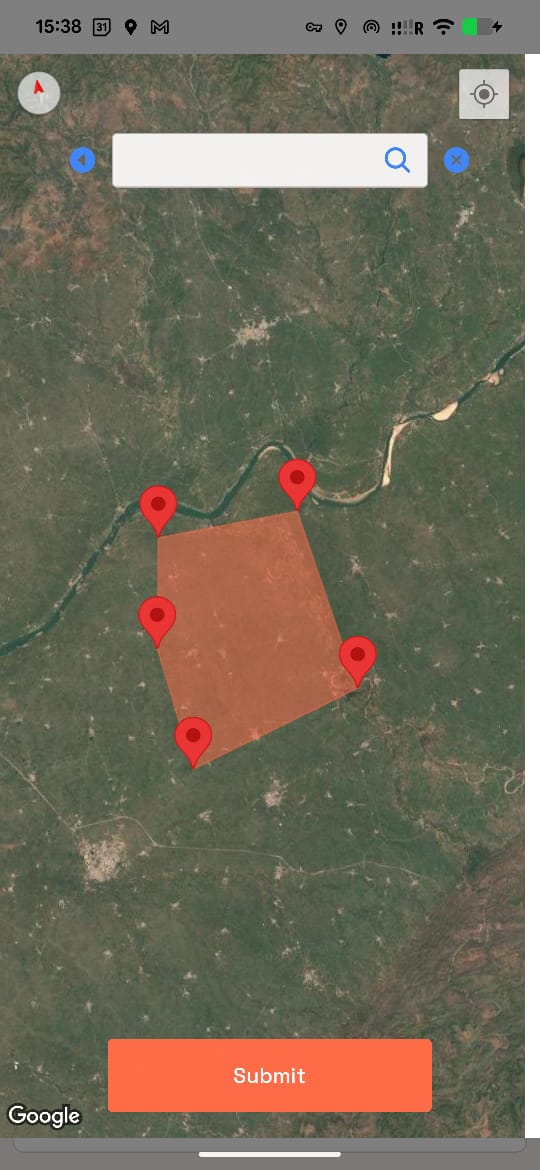
latitude, longitudeorder. - Place at least three points around the field boundary.
- Check that the polygon covers the intended field. Use the clear control and start again if a point is incorrect.
- Select Submit on the map.
Multiple coordinate pairs can be entered by separating each pair with a colon, using the format:
latitude,longitude:latitude,longitude:latitude,longitude
Review the field and select Submit field while connected.
Create a facility
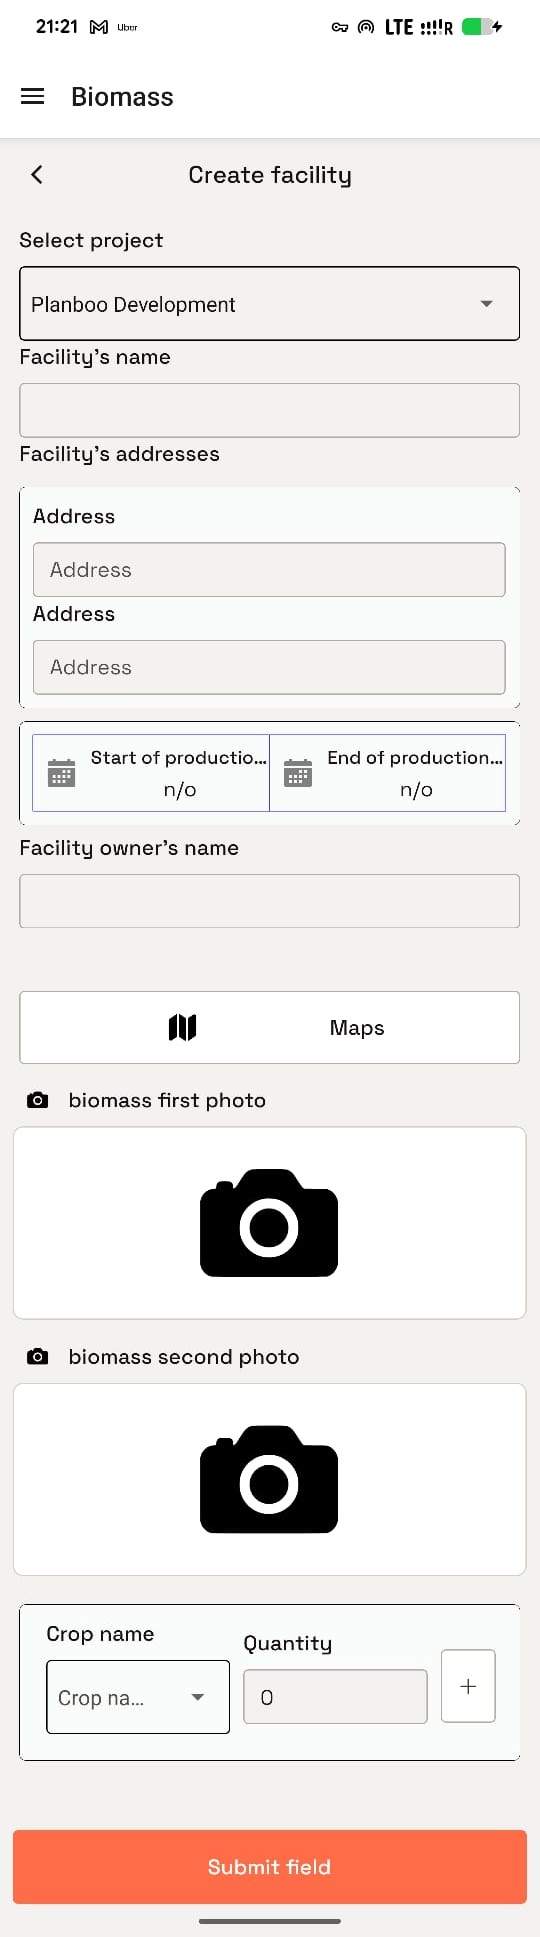
Use a facility when biomass comes from a physical processing location rather than a field. Select Create facility, then provide:
- project and facility name;
- address and production-cycle dates;
- facility owner's name and email for the biomass audit;
- GPS location;
- photos showing the facility, biomass type, and quantity;
- crop or waste-biomass type and expected quantity.
Review the information and select Submit facility while connected.
2. Record production
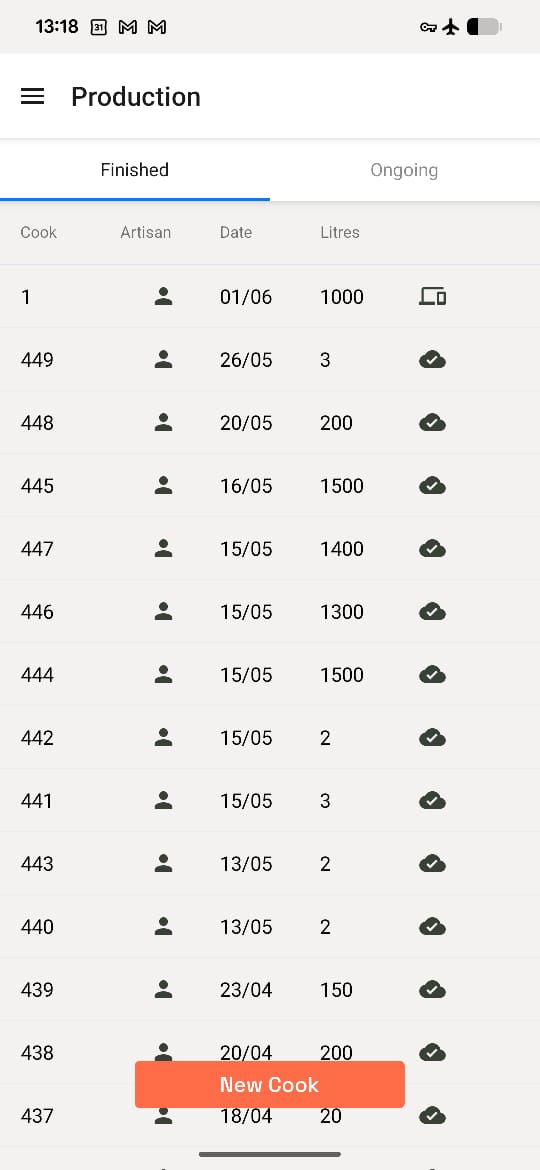
Open ≡ → Production. Finished and ongoing cooks appear in separate lists. Select New Cook to begin.
Record:
- project, kiln, and certified kiln operator;
- one biomass type for the cook;
- a photo showing all biomass that will enter the kiln;
- the highest result from at least 5–10 moisture-meter readings;
- a moisture-meter photo showing the reading and biomass;
- cook-start, cook-middle, and cook-end photos;
- biomass input in the agreed project unit;
- biochar output in litres;
- confirmation that the required sample was taken and stored.
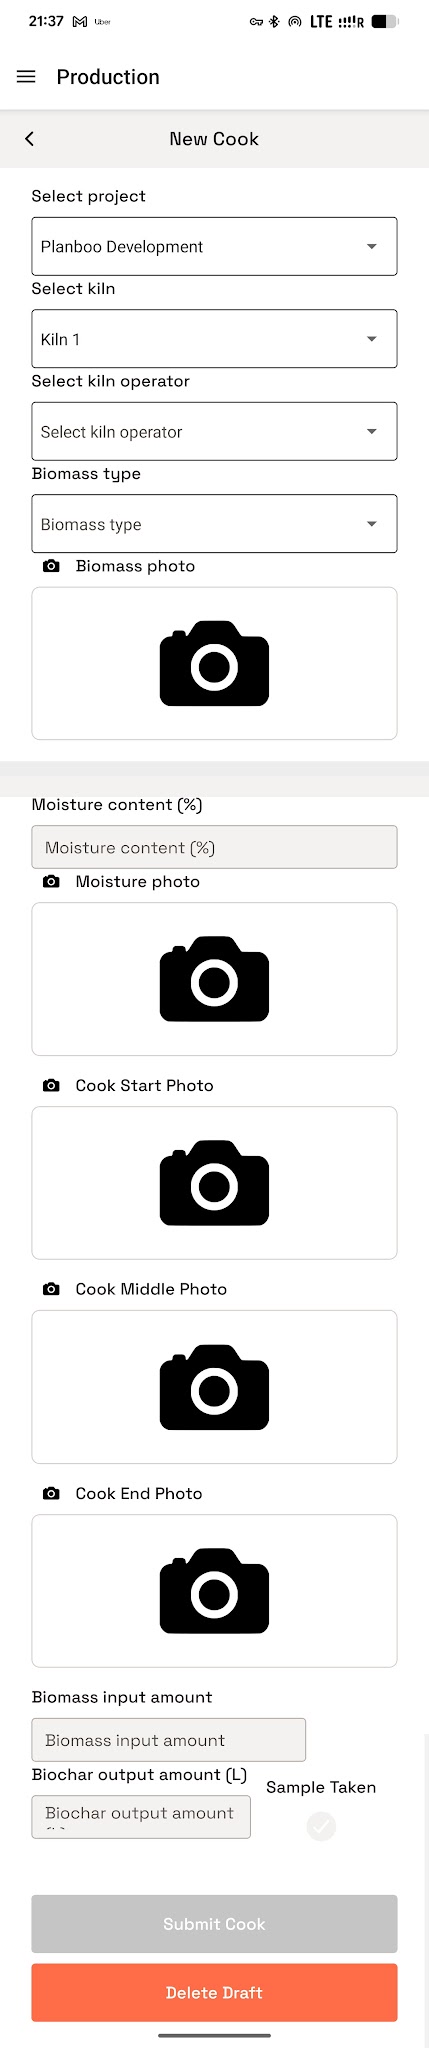
Select Submit cook only after the cook is complete and every required item has been checked. If you leave before submitting, return to the saved draft from the Ongoing tab.
3. Record a mixture
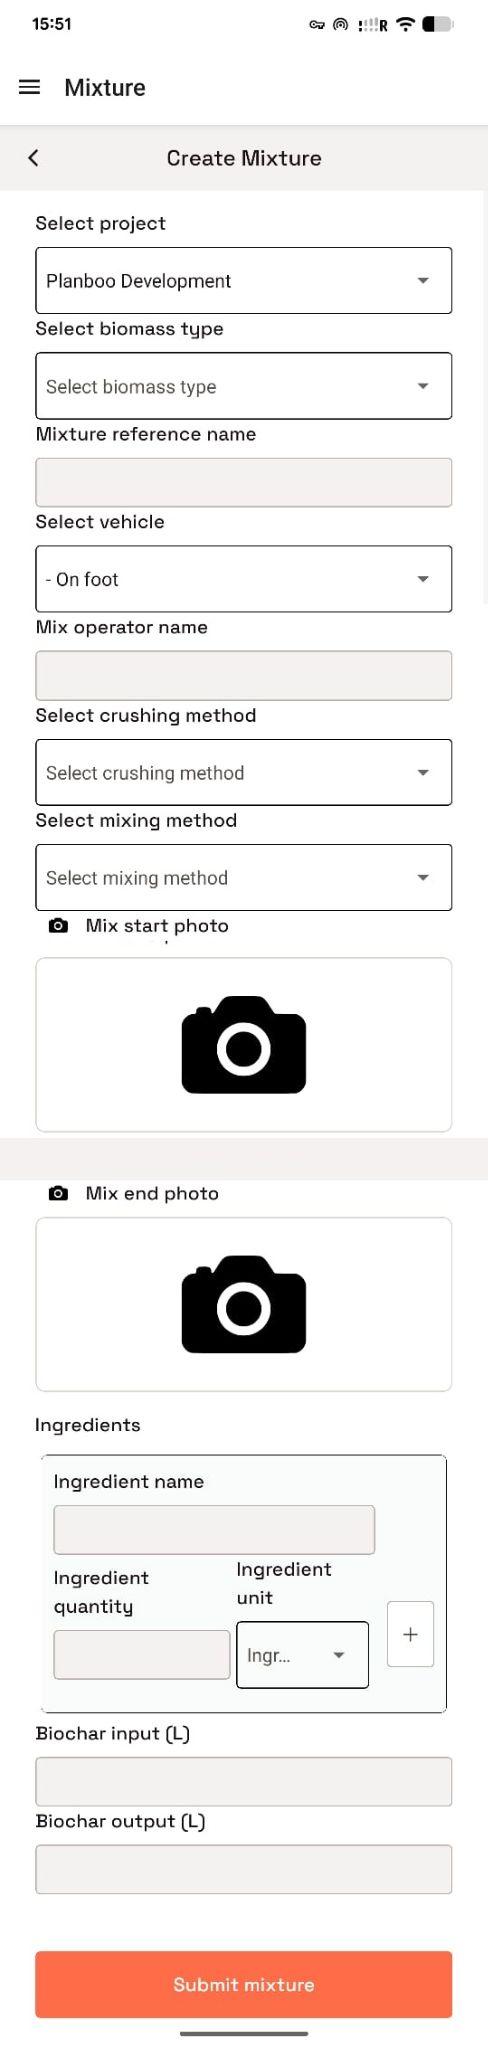
Open ≡ → Mixture, then select New Mixture. Record:
- project and biochar feedstock type;
- a useful mixture reference, such as cook number, mix number, or date;
- the vehicle used from kiln site to mixing site;
- mix operator;
- crushing and mixing methods;
- a start photo showing biochar and ingredients before mixing;
- an end photo showing the finished mixture;
- every ingredient's name, quantity, and unit;
- biochar input and mixture output in litres.
Mark the mixture finished only when the record is complete. Otherwise, leave it in Ongoing and finish it later.
4. Record an application
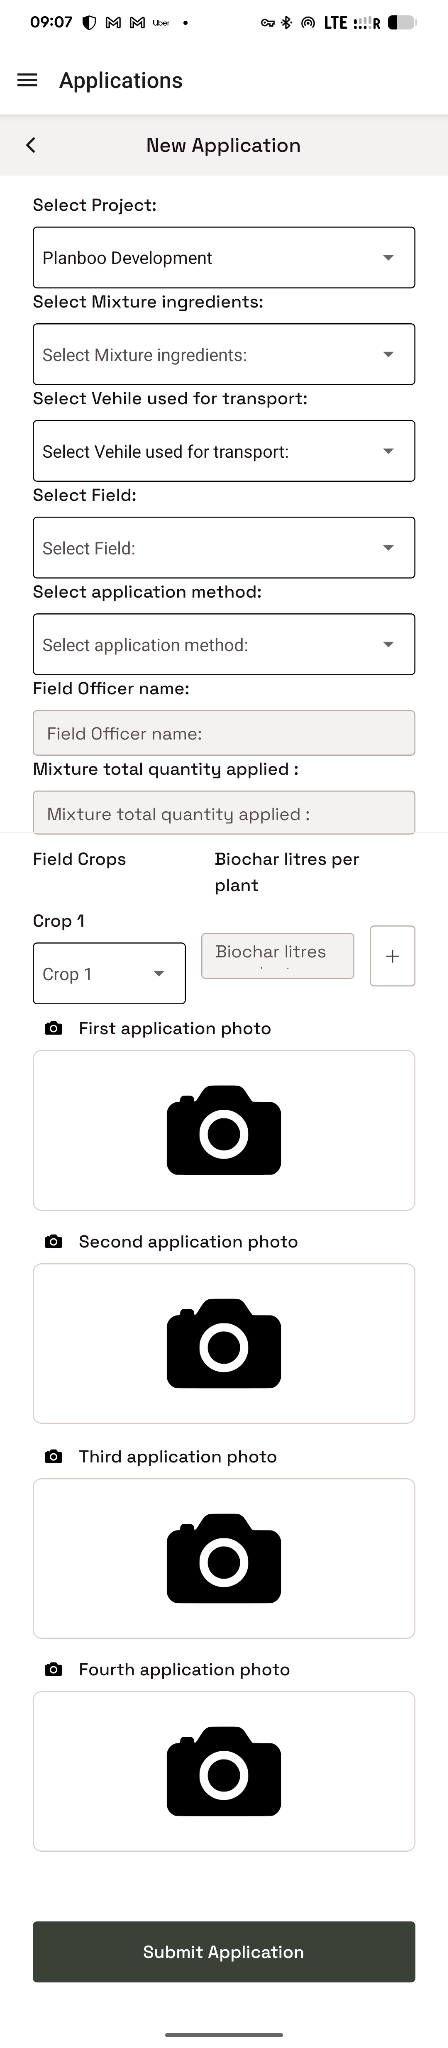
Open ≡ → Application, then select New application. Record:
- project and exact completed mixture;
- vehicle used from the mixing site to the application site;
- field officer and previously recorded field;
- application method;
- total mixture quantity applied in litres;
- crops or plants and the litres applied per plant;
- four photos showing the application around the field.
Submit only when the application is complete. An unfinished application remains available from Ongoing.
5. Synchronize and confirm
A phone icon means a record is waiting on the device. A cloud icon means it has synchronized. When connectivity returns:
- Open the navigation drawer.
- Select Sync Offline Cooks or Sync Phone Data, depending on the app version shown on the phone.
- Wait for all records and photos to upload.
- Confirm that each completed record shows a cloud icon.
See Offline synchronization before logging out or changing phones.
Confirm success
The workflow is complete when the field or facility, cook, mixture, and application are all submitted under the correct project and show successful synchronization.
If a permission, GPS, visibility, or synchronization problem remains, follow Troubleshooting.