Install and use Greenbox
This guide is for trained kiln operators preparing a Greenbox to record a biochar cook. A correctly prepared Greenbox powers on, detects its thermocouple, records the cook, and uploads the saved readings when connectivity is available.
Before you begin
Confirm that you have:
- a Greenbox controller, charged battery, charging cable, and thermocouple probe;
- the Wi-Fi network name and password for the network used at the site;
- a phone with a camera for scanning the on-device QR codes;
- the intended company, project, and kiln assignment.
Keep the Greenbox enclosure sealed unless you are following an approved maintenance or troubleshooting procedure. Keep the probe's plastic components as far from the kiln heat as practical.
1. Charge and connect the battery
Charge the battery to at least 20% before starting. The training manual estimates that a full battery lasts approximately 20 hours or ten cooks, depending on the biomass and operating conditions.
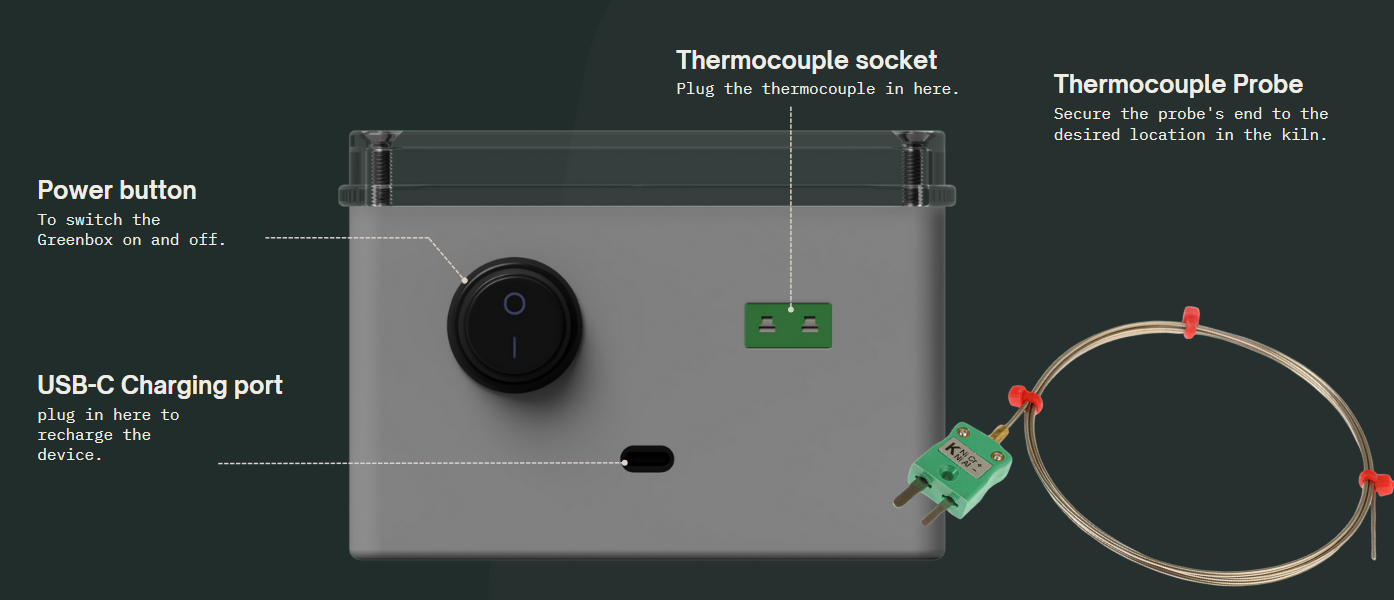
Connect the battery through the USB-C charging port shown below.
2. Connect Greenbox to Wi-Fi
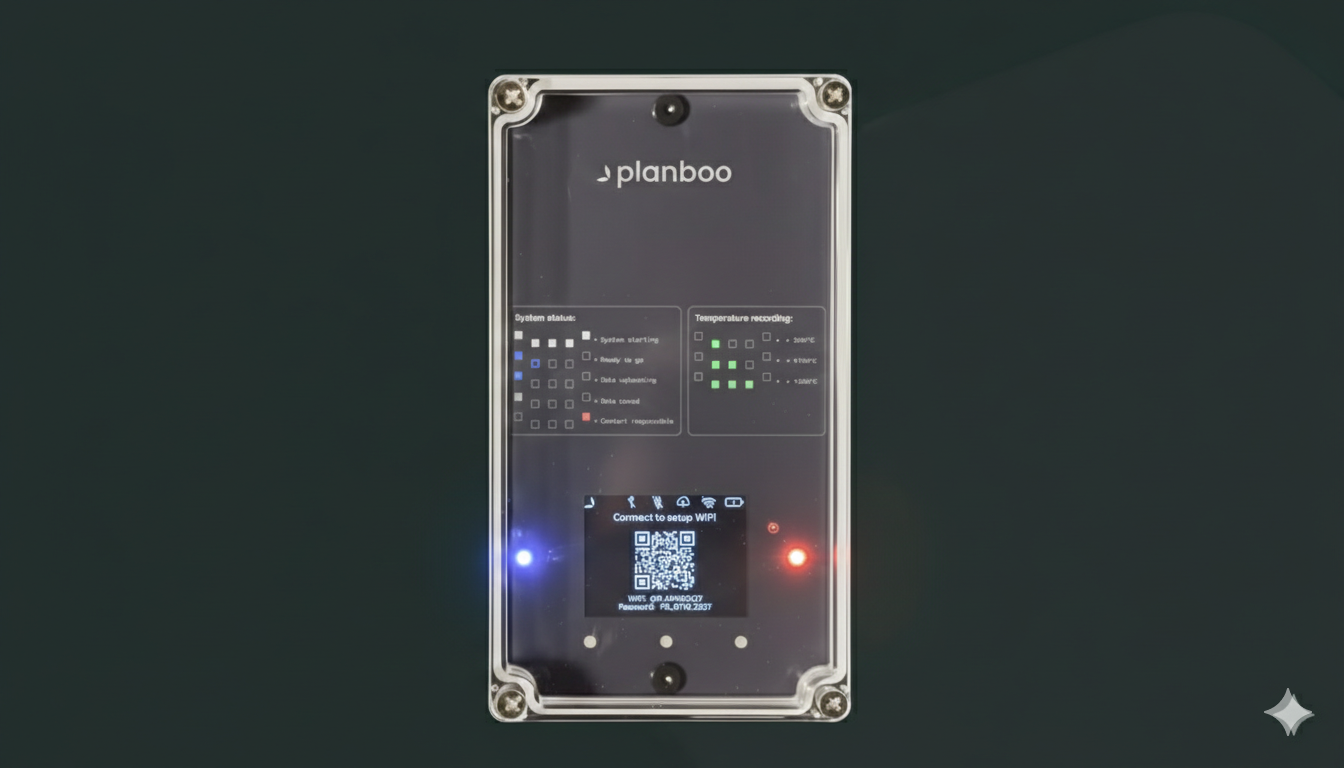
The Greenbox displays two QR codes during network setup:
- Hold the push button while switching on the Greenbox.
- Keep holding the button until both the blue and red lights are on.
- Scan the first QR code with the phone camera and select Join. This joins the Greenbox's temporary internal network.
- Scan the second QR code to open the Wi-Fi setup screen.
- Enter the local network name (SSID) and password.
- Select Save and Continue.
- Wait for the device to confirm that setup is complete. The status light turns blue after a successful connection and synchronization.
Watch the Greenbox Wi-Fi setup video.
3. Connect the thermocouple
Insert the thermocouple cable into the thermocouple socket on the Greenbox enclosure. Make sure the connector is fully seated before continuing.
4. Check the device status
The enclosure LEDs communicate the current state:
| Light | Meaning |
|---|---|
| Solid blue | The system is ready and previously recorded cook data has synchronized with Planboo. |
| Flashing blue | The Greenbox is uploading data. |
| Solid green | Data is saved locally and will upload when connectivity returns. |
| One green LED | Recording is active and the measured temperature is above 50°C. |
| Two green LEDs | Recording is active and the measured temperature is above 300°C. |
| Three green LEDs | Recording is active and the measured temperature is above 550°C. |
| Solid red | The thermocouple is not detected or a data-upload error has occurred. |
The display also shows the current temperature and cook time.
5. Install the probe
Slide the probe into the kiln tube, or into the position assigned during site training. Keep the plastic parts away from the heat source.
6. Record and upload the cook
Once the probe reaches the heat source, the display changes to show Cook Time and Current Temp. During the cook, check that the green temperature LEDs activate as the temperature rises.
At the end of the cook, the display reports that the cook is complete and the data is saved. If the site is offline, leave the data on the device. When the Greenbox returns to its configured Wi-Fi network, it uploads automatically and the status returns to solid blue after synchronization.
Watch the Greenbox pyrolysis video.
Confirm success
Before finishing, confirm that:
- the thermocouple was detected and no solid-red state remains;
- cook time and temperature appeared on the display;
- the device reported that the cook was complete and saved;
- the light returned to solid blue after the device regained connectivity.
Setup record
Keep a record of the device and assignment used during setup. This information is required when diagnosing telemetry that is missing or associated with the wrong production context.